Five Tips to Begin Underwater Photography for Scuba Divers and Snorkelers
I was asked several times to write about how I do my underwater photography and how to start taking pictures underwater. Since I am not a professional photographer and I don’t have a formal education in photography, what I can write is based on my experience. I hope you will find the tips helpful and easy to follow.
First Step: Choose the Right Camera
There are several medium/camera options to take underwater pictures: (a) DSLR/MFT/Compact Camera with underwater housing; (b) action camera ; (c) waterproof camera (usually up to 10 meters/33 feet deep); (d) mobile phone camera with underwater housing; and (e) diving/snorkel mask with camera.

Some options are affordable, but are they the right choice for you as a scuba diver or as a snorkeler? Additionally, think about the long term as if you would like to advance your underwater photography in the future.
For a scuba diver, there is a chance that you will dive deeper than 15 meters, and when you dive deeper, you will need external lights (I will explain on the next tips). Do consider a camera or underwater housing that support the depth more than 15 meters (40 meters usually the maximum) and with a possibility to attach red-filter or to use external artificial lights.
My personal references as a scuba diver are options (a) and (b). Some scuba divers use action camera like GoPro for both photography and video. Action camera is awesome for scuba diving because of its wide angle lens. However, it has a limitation if you wish to focus on the small subjects like nudibranch, small shrimps or juvenile fishes. I use action camera mainly for video.
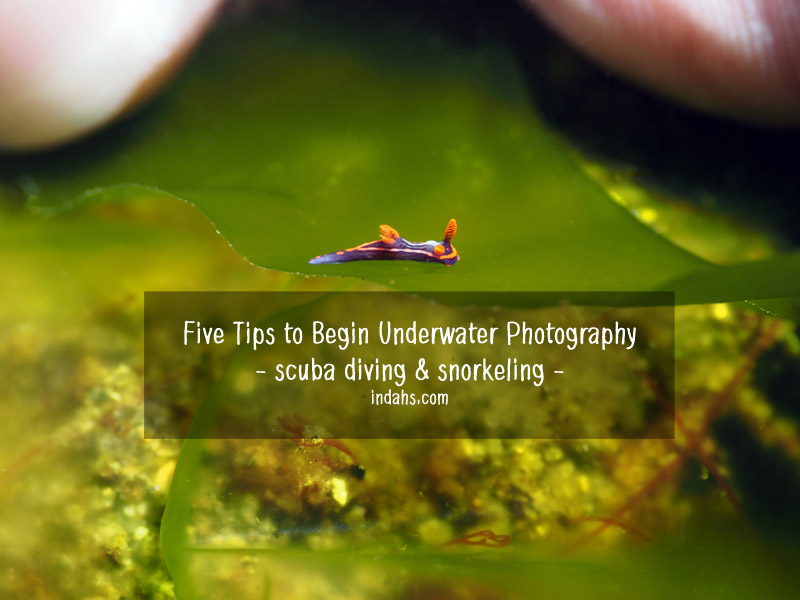
Action camera will not be able to capture this image. This image was taken using MFT camera with underwater housing.
As for snorkelers, as long as you do not go deeper than five meters, all options should be possible. However, if you wish to become more advance in underwater photography, you should consider the option (a), you can start with a compact camera that allows you to use a manual setting.
Second: Improve Your Buoyancy and Swimming Skill
For a scuba diver, the most challenging part in taking picture underwater is the buoyancy. Excellent buoyancy will ease you to take underwater pictures of your subject with many different angles without worrying that you will touch the corals or scare your subject. To achieve excellent buoyancy, you need to have the correct weight balance on your hips or inside your BCD jacket, take care of your breath and more scuba diving.
For snorkelers, swimming skill is crucial especially if you wish to take a picture not top to bottom view, but face to face with your subject. You have to dare to do free-diving to get ‘face to face’ angle with your subject.


Third: Lighting is Your Photography Friend
Most color is absorbed in the deeper sea. Red, orange, and yellow are absorbed first, that makes the pictures taken underwater without external lights will look blue or greenish.
For scuba divers, your camera will bring the colors back with the help of external artificial lights from (a) your camera’s internal flash with a white bouncer; (b) underwater photography torch light, and (c) underwater flash (usually called as strobes). If you use strobes, you can set your camera white balance to auto. It works for me very well.
Another option is to use a red filter and play around with the camera’s white balance. But don’t use a red filter at the same time with torch light. After several experiences using a red filter, I conclude that the red filter is best used without the artificial lights. The red filter is best for snorkeling’s images when natural lights from the sun are available but limited.
Following is a video to give an example how different does it make when using artificial lights underwater.
Fourth: Be Patience and Know Your Subject
Marine animals have unique behaviors and living habitats. They are also excellent in camouflage. In an example, when there is anemone, usually there will be clownfish, and sometimes you will see anemone shrimps and crabs live in the anemone. Three subjects in one place! Sea star (starfish) and scorpionfish usually on the bottom of the sea. Blennies often hide inside a hole of the corals, but they will show their face once a while – just wait until you get the right timing to click your shutter camera.
Bigger marine animals such as turtles and cuttlefish usually swim away if they feel uncomfortable by humans’ presence. Take your distance and respect their territory, then you will get a better result in taking their pictures without harassing them.


Fifth: Digital Processing Helps Enhancing Your Image
Digital processing usually helps a lot in enhancing your images. I use Adobe Photoshop CS to edit my underwater pictures. Free legally Adobe Photoshop CS 2 is available from this link: Adobe Photoshop CS 2 Free Download. Other photo software such as Lightroom or free online photo image editors like Pixlr.com or Gimp.org should work too.
More about enhancing your digital underwater pictures, please visit this excellent post by World Adventures Divers. The basic editing is universal and applicable to most photography software.
Good luck and feel free to write your questions/concerns in the commentary section 🙂

We only have a GoPro Hero 3 Plus, and although we can take fairly nice underwater photos, it’s just isn’t enough. We hope to invest on a DSLR, but the equipment is still way beyond our budget.
Go for MFT – Micro Four Third camera, you can change the lenses as well. MFT Cameras nowadays have similar quality to DSLR and they are very light. You will grateful to have a light camera when scuba diving 😉
Interesting tips and beautiful photography 👌 Thanks.